Showing posts with label beef. Show all posts

Sunday, February 21, 2016

Molto Caldo Controlfiletto Di Manzo Salumi

This is one of my favorite Salumi's. I have made this a couple of times but never with this cut let alone being of Prime grade. Salumi filetto di manzo and Salumi lombo di manzo are my original recipes. Why the funky name? I like crazy funky names that's why. What does it mean? Molto Caldo (Very Hot) Controlfiletto (Sirloin) and Di Manzo ( Bovine aka Steer). I have noticed a trend with Beef Charcuterie taking on the Pork traditional names and I am not a fan. In most cases I try to come up with my own names. In the U.S for example there is Coppa, Cappicola or my favorite funky name Gabagoul pronounced Gaba-gool denotes a traditional Italian pork dry-cured muscle running from the neck to the 4th or 5th rib of the pork or shoulder or neck. My point is this; the beef counterparts should have their own unique names because it's beef not pork. When you hear Coppa you think of Pork not Beef. I made a Veal version of Pancetta but I came up with my own name. I did not call it Veal Pancetta. I name my original recipe Vealcetta and I am working on beef version called Bovicetta (Bovine). Ok, off my soap box.... at least for a while. 


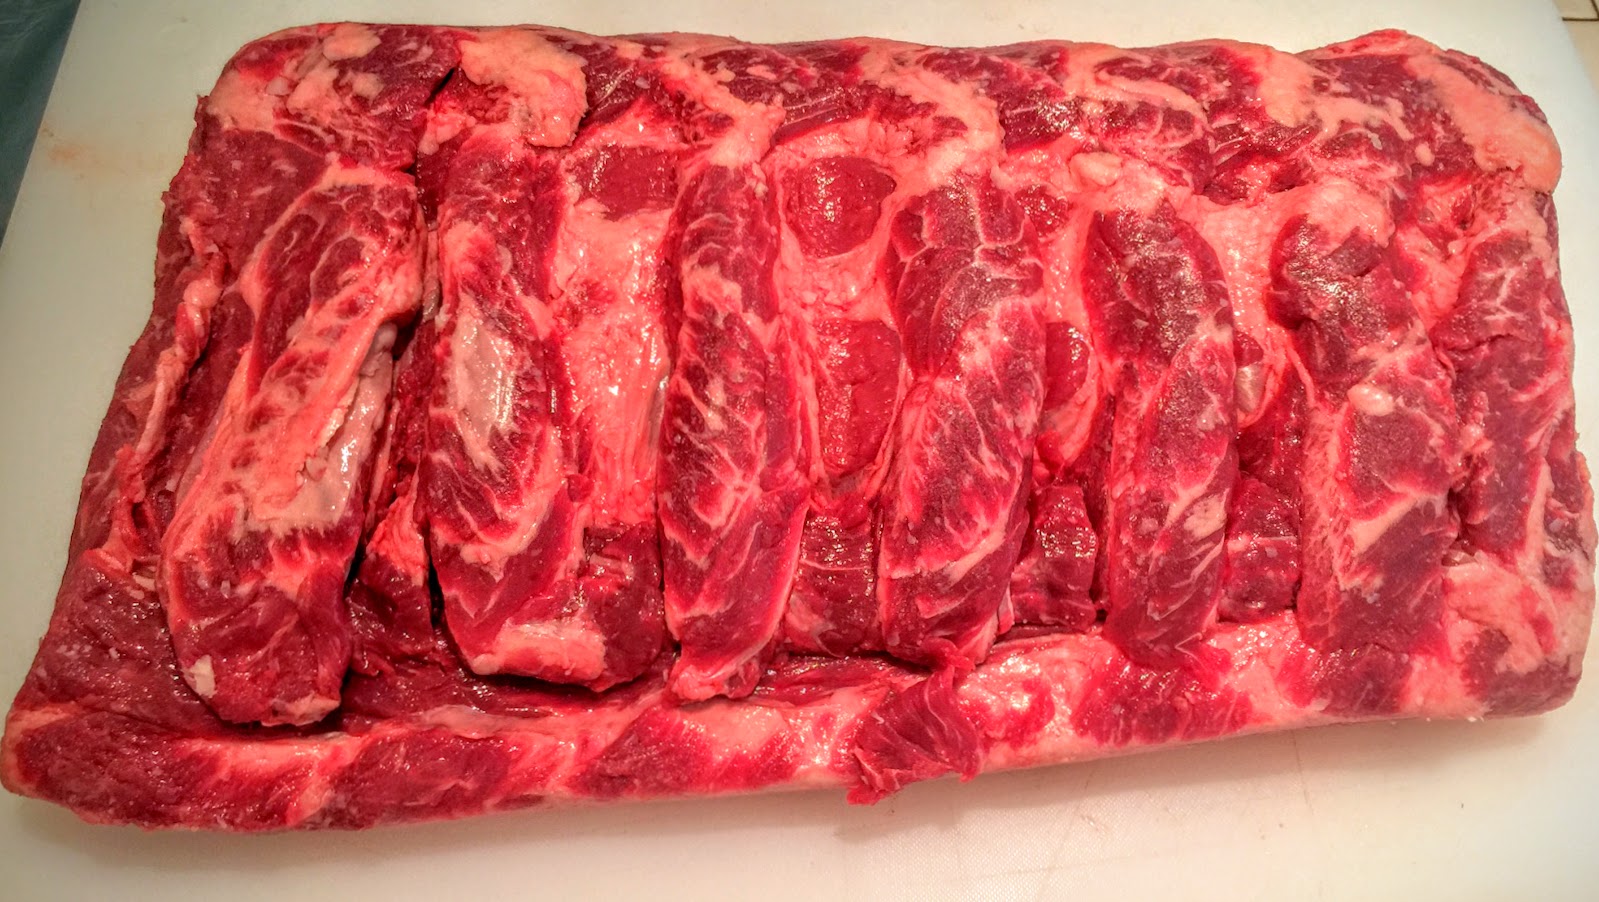
Sirloin unsheathed from its plastic home and trimmed up just a little.


Since I have made this several times before I will keep this post short. If you want additional info click on the link above. Here's my list of ingredients. 


Salt & Cure #2 applied to every nook & cranny.

The heavy rub applied.


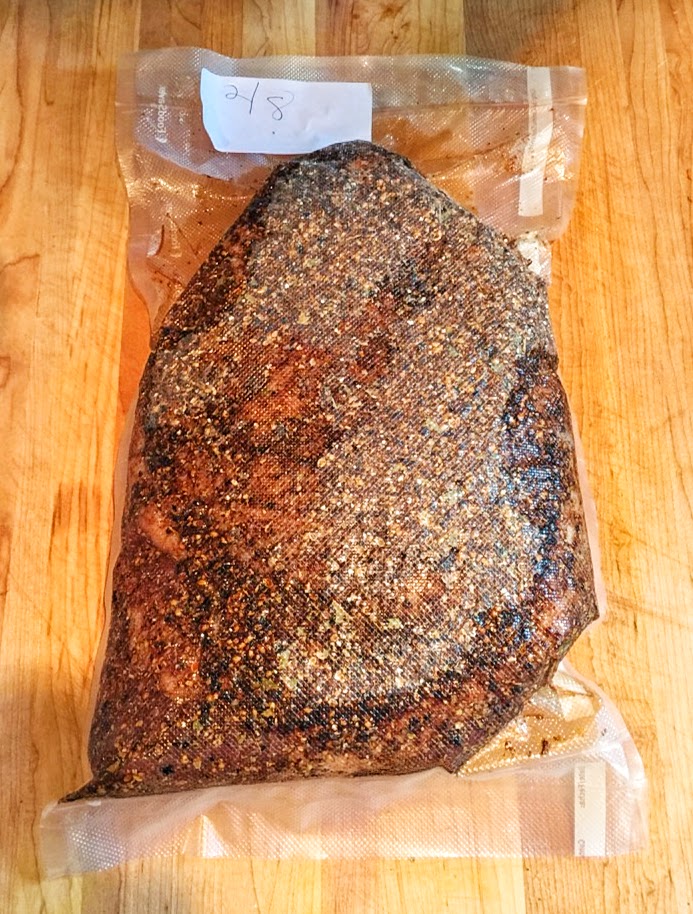
Dripped in Wine!!! I love wine!! All vacuumed sealed. The chunk of meat will be flipped everyday for 21 days. 


It's been a long 21 days but it's all cured and ready for the next step.


Combine and mix equal parts of Cayenne, Garlic, Smoked Paprika and Pepper and coat the Salumi. 


Tied to hold it's shape while drying. Place in UMAI bag to dry. 


I placed the Salumi on a rack inside my refrigerator with a little fan blowing to circulate the air. I also placed a bowl of salted water inside to generate some extra moisture. The extra moisture will prevent case hardening. 

The Green Weight was 2722g and needs to lose 30% it's original weight which equates to 816g loss which brings it down to 1906g. 


Well it's been almost 10 weeks and I am proud to say that I nailed it... My timing was perfect. Final weight of 1906g was achieved!!!!! All done...


Rope removed....only there to keep shape while drying. 


Meat vacuumed sealed in a normal bag to equalize. It will sit like this for a minimum 2 weeks. Equalizing just means that the moisture has a chance to distribute evenly through the meat. 


It's been about 2 1/2 weeks and she is ready to be sliced very very thin. Review at the bottom


Review- Amazingly good!!!! It's pretty spicy but if you like hotter you can always add more pepper. 


TOP OF THE PAGE


Tuesday, September 15, 2015

The Majestic Ribeye Pastrami

"Frugality Has No Place in Culinary Epiphanies So Sayeth Me"


So I started my Pastrami blog with a notable quote from yours truly. These thoughts came to me after I received some interesting feedback after posting a picture of my future Ribeye Pastrami in a Facebook group I belong to.

Some of the comments were...."Dang that's pricey Pastrami I don't get it", "do you feel this is a good use of a ribeye roast opposed to steaks? Is it THAT much better than brisket (or whatever else you may use), or is it more novelty and experimentation?

These were just some of the questions and comments I received when I posted that picture. For me food has always been about experimentation and thinking outside the culinary box. There is nothing wrong with tradition but when a culinary epiphany pops in my head there's no stopping me. I don't care what it costs, how far I have to drive to get that one ingredient because at the end of the day I can look back and say I did it "My Way". I refuse to let anything limit my creativity whether it's money or just plain information. Let's be honest here, one does not prepare food in this way because it's more economical; on the contrary we do it because we have too. 


"I am a culinary Heretic with no constraints or limits." 

"You can call me the majestic meshuggeneh of fleischige."


From these pics you can see there's lots of hard fat. 


I removed about 2 lbs worth of hard fat from the Ribeye and all in all it wasn't that bad. I expected a lot more fat. 
As always I took the whole spices and herbs, (Bay leaf, Grains of Paradise, Coriander, Juniper berries, Whole cloves and mustard seeds) and placed them in a dry pan and applied a little heat to them to bring out their essential oils. I then grounded them up in a spice grinder. 

Click here for recipe and Click here for Dry-Cure-Notes.

One technique that is unique to my process is the way I apply the dry-rub and cure. Some people combine the salt/cure, herbs and spices together first then apply to meat. I like to first combine the Salt, cure then apply to meat making sure I get it into every nook and cranny. When you apply everything at once some of the rub is going to run off the meat and you never know how much cure actually got on the meat. It's imperative that the right amount of salt and cure makes its way on to the meat. 

Now the simple part. Combine the rest of the ingredients and pack them on to the meat. There will excess rub that will fall to the side but don't worry about this. Make sure to coat every inch of the piece of meat. No rub will go to waste because the excess rub will be tossed in bag. 
Carefully place your meat into a vacuum seal bag making sure not to scrape off too much rub. Make sure all salt and rub gets into that bag. Refrigerate and flip every day for 21 days. If this was a smaller piece of meat it would only need about 14 days. I am using a precise equilibrium cure so I am not worried about over curing because that can't happen. If the standard bag is too small you can get larger ones like the FoodSaver GameSaver bags 15" X 20'. The 15 inch bag will not fit in a normal machine so you will have to vacuum seal at an angle or buy a bigger machine like the FoodSaver GameSaver Titanium Vacuum Sealer


Picture 1- Ribeye cured and rinsed.

Picture 2- Ribeye coated with rub. Rub can be found HERE.

Picture 3- Ribeye being cold smoked for 8 hours using A-Maze-N-Pellet-Smoker. Nifty little device that's worth looking into. I decided to cold smoke at night because temps were so much cooler than the day. The ambient temp that night was about 53 degrees and I added Ice to the smoker to ensure temp was low. 

Picture 4- Fully cold smoked for 8 hours. 


After the meat was cold I decided to foil it up and refrigerate for a day. Meat now double vacuumed sealed using my Gamesaver. I always double vacuum seal my long Sous-Vide cooks. I am always worried about bag breakage. Anyhow I Sous-Vide the meat at 135˚Æ’ for 30 hours. 


After the long thermal bath I shocked the Ribeye and brought the temp below 40˚Æ’. The Ribeye was refrigerated for two days. I only needed one but I work and sometimes our schedule gets in the way of our creativity. Anyhow I unsheathed the Ribeye and now it's ready for the next step. By the way there was very little moisture loss during the cook.


This step has to be the simplest of all of them. 

Coat the entire Ribeye with coarse black pepper. 

This Majestic Ribeye will be hot smoked using apple wood. I am using my WSM. The Ribeye will smoke between 180-205 degrees until an internal temp of 140 degrees is reached. 

All DONE~~~ what a beauty. I will let it rest about 15 minutes before cutting into the majestic beauty.

Gratuitous Picture Below Including Review.


Review- One word amazing. I will do this again. I have eaten and have made more pastramis than the average person so I am more than qualified to critique my own pastrami. 

I have eaten and created Brisket Pastrami both point and flat, Tri-tip pastrami, Turkey Pastrami and several variations of Lamb Pastrami many times and this is by far the best. Textually flawless, fat content could not be better, tasted perfect and cooked to perfection. This in my opinion makes the best pastrami. 

I learned a lot from this Ribeye. If you look at the picture that shows a side profile of the cut you can see a slight difference in the color of the meat. I cured the Ribeye for 21 days which has always been adequate for all my cures but came up a little short on this one. The girth of this and its mere size required more time to cure. I should have either injected the cure into the center or gave it another 7-10 days to cure. The cure missed the last inch in the center of the ribeye. So other than color it was still pretty much perfect. 

Dang I will do this again. If I owned a deli I would have this on my menu and be happy with just breaking even. This is not about making a profit but sharing something extraordinarily amazing. 

Sunday, March 8, 2015

Megillah of Pastrami

Pastrami, Pastrami how do I love thee. Evidently a lot!!! I have been making different versions for a while now and although they all have turned out pretty darn good I keep tweaking the recipe. I want pastrami nirvana!! Here is a listing of my Charcuterie which includes of course my Pastrami's. Personally I think the best pastrami comes from the Navel or the point of the brisket. What you will find in most supermarkets is pastrami from the flat. It's OK but there's not enough fat to be heavenly. I know when I have eaten good pastrami sandwich by the way it feels in my mouth. When the culinary angels start singing in mouth and I am smiling from cheek to cheek I know I have the real thing. Its been my experience that Navels and points are hard to come by so you make the next best thing which is the flat. What you could settle for is a packer brisket but they are hard to find too. 

Don't even think about buying a Navel without a special order. Sometimes the special order will come frozen with all the bones too. The whole thing will probably weigh in at 40 plus pounds. I need to investigate this more.


The world greatest pastrami sandwich can be found here at Katz's Deli in NYC. Take a look inside using this link....HERE

How do I know you ask? After 125 years the world knows that's how. 


My Yiddish speaking grandmother lived across the street from this landmark (HERE). I can't tell you how many times I have eaten here. As a young Jewish boy I did not know any different. I thought this was the norm. A deli on every street corner was typical for for me growing up in the 60 and 70'S in NYC. 


I ate traditional deli food all my life until I went into the Navy. My mother use to send me Salami's from Katz's when I was in the Navy too. In my day this was normal. Sending care packages abroad was typical. And if you're Jewish your Moms sent salamis? Thanks Mom that was awesome. After a very short time it became quite obvious that my times of real Deli food was a thing of the past. To recapture some of that food nostalgia I would mail order their meats but that became cost prohibitive especially on a sailors budget. Just check out their prices online, very expensive. Have you ever eaten Knoblewurst? It's a Jewish heavily garlicky sausage. It's to die for. My father and I would go to Katz and he would order the Knoblewurst and I would get the pastrami, or a frank and a knish. Needless to say I am addicted to good Jewish deli. The search or need for the perfect Pastrami is in my genes. I cannot be denied, I will not be denied!!! 

Here are a couple of articles that you must read if you want to learn more about Pastrami. They're top notch articles. "How Katz's Deli Makes Their Perfect Pastrami", "What's the Difference Between Pastrami and Montreal Smoked Meat?" and "Sorry, New York; Why Los Angeles is the Best Pastrami City in America" 
First off let me say that Brisket and for that matter the point is not my ideal Pastrami cut. I need to hunt down the Navel cut!!!!! Pastrami needs fat to taste good. So maybe my next post will be about Navel Pastrami Nirvana. 
DRY CUE NOTES
This is a slightly altered recipe from. My perfect rub which is listed under the Prime Tri-Tip Pastrami.  The actual ingredients are the same and so are the percentages.


The only difference was the subtraction of 25% from every ingredient because I was producing too much Rub/Cure. I need to cut back on the overall volume I was producing. Trying to fine tune the rub to prevent loss!!!


Meat trimmed lightly. I remove thick outer fat layer. It was trimmed down   to about 1/4 inch. I mixed together the salt and Cure # 1 and rub into the brisket making sure I got it into every nook and cranny. 


To bring out more flavor I heated all the whole spices in skillet briefly then ground them in my spice mill to a med grind. I liberally applied rub all over the meat. The meat is all vacuumed sealed up and will be flipped daily for 14-21 days. 

I used equilibrium curing instead of excess salt curing. Excess salt curing is a technique where you cover the meat entirely in salt. Equilibrium curing is using exact amounts needed for the cure. "This method would be the Sous-Vide cooking of the curing world"Jason 

Molinari


All Vacuumed Sealed up and will be flipped every day for 14-21 days. After curing I will rinse the corned beef and apply rub. The Pastrami will be cold smoked for 10 hours, then SV'd. I will Sous-Vide the Pastrami for 48 hours at a 149 degree water temp. After the Sous-Vide I will refrigerate over night (optional) and apply a light rub and Hot smoke again to form a better bark. When I say hot smoke I am talking about 200 degrees or below. 

All done!! 21 days cured. Since I used equilibrium curing technique you cannot over cure. Rinsed and ready for the dry rub.


Dry-Rub Applied.


Cold smoking using the A-Maze-N Smoker

The ambient temps outside were about 48-52 degrees. Had the temps been much higher I would have have filled my smoker with a tray of ice to cool it down. I cold smoked the meat for 10 hours. 

Now for the long thermal bath. Gonna cook it (Sous-Vide) for 48-50 hours at 149.0 degrees. I am using the Polyscience Chef series SV unit and their polycarbonate container with lid. A great combo to cook large pieces of meat.
After the SV'd I plunged the Pastrami in an ICE bath to cool it off rapidly. The pastrami was refrigerated over night to await the next step. The next step is easy and optional. I coated the Pastrami once again with a rub but this time it was only course black pepper. I took the very cold pastrami and hot smoked it at 200 degrees for 2 hours. If its a warm day I add ice to the smoker insure it does not raise above 200 degrees. 

This not only creates a great bark but brings it up to a proper temperature for slicing. An option is to skip the hot smoke and just steam. In fact if I was to take it out of the refrigerator I would steam it until nice and tender then slice. 


Gratuitous photographs and Review below.


Overall it came out great. I feel as though it was too flaky. 48 hours at 149 degree might be to long. I will try 36 hours next time and will keep lowering it until I find the magic number. 


Update 05/09/2017- After trials and misgivings about time and temps I think I have finally nailed down the temps and times. That being said I think I have made well over 250 lbs of Pastrami to reach these new numbers (explains waist line too). Drum roll please... 142 f for 40-44 hours. Ta-da..... The lower temp ( 148 vs 142 f) and the lower time (48 vs max 40-44 hrs) produces a moister better textured Pastrami. Update Cure and Rub HERE and Latest Pastrami HERE.