 The origins of this venture started with two other Salumi's. Shortly after Thanksgiving I was at Safeway which is not uncommon for me. I grocery shop at least 5 days a week. Anyhow lo-and-hold hanging out in their meat case were a half a dozen Beef Loins weighing in at 14-16 lbs (heavy discount too). I must have walked buy this extravaganza of meat at least 3 x before I pulled the trigger. As I pondered the purchase of the Loins I had to figure out what do with them.
As most of you already know I love Cured Meat and a while back I used the Loin successfully (multiple times) to make my version of Basturma so with that in mind I purchased a 16 pounder. Hmmmm..... what to do?
I arrived home and showed the wife my glorious purchase. As always she just nodded her head. My wife is awesome... no judgement with my food and meat obsession so she just nodds and smiles. I get it I feel the same way about her shades of Lipstick too. Anyhow she was headed out to do some girl stuff so I took that opportunity to have her run by Safeway again. I asked her buy me another Loin. As always she smiled and said OK...LOL. Yup that's right one more. I decided to Dry-Age that one in my Steakager. I'm going to age that one for at least 35 days.
And over the course of several more days I popped back in Safeway and bought my third. Yes that's right a third one which has brought me to this post which is all about the Finocchiona-Calabrese Chili Salume. I used the fat from the other two loins and added lean meat to the fat to make a Salume. Normally you start out with lean meat and add fat to make a Salume but I had all this fat and I had to do something.
Let's begin.........
 How to calculate Meat to Fat Ratio? Click HERE
These ratios were in a way just by chance. I had lots of fat on hand and I needed to add some lean meat so I could make a Salume. These cuts were on sale so I purchased them hoping they would suffice.

 Here's a picture of all the lean meat cubed up into 1-2 inch pieces. I did this the night before out of convience and timing. I placed all the cubed pieces of lean meat on a flat tray and placed in the freezer. The meat will be partially frozen which makes for an easier cleaner grind.

I did the same thing with the fat. Not rocket science mind you but very important. If you neglect this step with the fat it will smear up the grinder. Not fun to clean at all. Pic to the right is the Loin where I procured the fat from.

 For this step I chose to grind both the Lean Meat and Fat Separately. I used my Lem Big Bite Grinder which is a phenomenal grinder. This baby will grind 17 lbs a minute. Anyhow to produce a clean grind I always grind meat first through the largest diameter plate I have (1/2 or 3/4 inch). Than I grind through a 1/4 diameter plate again keeping them separately. After these two grinds I combined the meat together and ground them again through a 1/4 inch plate. Doing it this way produces a homogenous grind for a Salume. There are many other techniques too. You could use different size plates for fat and meat. Note: During the grinding process I rotated the meat bins in and out of the freezer to keep meat temp very low.
 This pic is not necessary but I wanted to add it none the less. When I create anything for the first time I do lot of tasting and jot down a lot of notes. This is just one page. There are a couple others. Anyhow if you decide to create something of your own make sure to take some notes so you replicate what you did but also so you see the evolution of your endeavor.

Here is a list of the ingredients. For the first 7 ingredients.... hmmmm should I talk about them a bit? Salt....duh it's necessary. Cure # 1....Safety and color. Dextrose for flavor (type of sugar), I also used Sodium Phosphate to help with the yield and with its ability for allow proteins to hold on to more water. More water greater yield and moisture. Non-Fat Milk..... binder and to preserve moisture when cooking, Corn Syrup Solids....To enhance the binding, Sodium Erythorbate....Speed up the curing and to set color faster. Anyhow combine the first 7 ingredients in a large bowl and set aside.

For rest of the.....I used whole Calabrian Chilis and Grains of Paradise so I processed them in a spice mill. Now this part is important: I used fresh Garlic and I was slightly concerned about Cooking at Low Temp (Botulism) using Sous-Vide so I decided to poach the Garlic first. I poached the whole Garlic Cloves at 250 f in Olive Oil. I tossed in the Garlic and slowly raised temp of oil up-to 250 f which took a while. At that point I cooled the garlic in oil for about 10 minutes before I used them. Using a food processor I ground up the Garlic and Sun-dried Tomatoes together.
Just a few cool videos!!!!
 After you have accomplished everything above get ready to mix. I'm lucky enough to have a very large mixing attachment. Connects right next to my grinder. Turn it on and slowly add the bowl containing the first 7 ingredients. Mix it for minute or two. Hmmmm....how does the texture look? Have a very large pitcher of Ice water ready. I added a whole lot of water.....maybe a quart in total. Anyhow slowly add the rest of the ingredients. When everything looks homogenous your'e done. Oh and take some out and sauté and adjust seasoning if you like.
 How to calculate Meat to Fat Ratio? Click HERE
 These ratios were in a way just by chance. I had lots of fat on hand and I needed to add some lean meat so I could make a Salume. These cuts were on sale so I purchased them hoping they would suffice.

 Here's a picture of all the lean meat cubed up into 1-2 inch pieces. I did this the night before out of convience and timing. I placed all the cubed pieces of lean meat on a flat tray and placed in the freezer. The meat will be partially frozen which makes for an easier cleaner grind.
I did the same thing with the fat. Not rocket science mind you but very important. If you neglect this step with the fat it will smear up the grinder. Not fun to clean at all. Pic to the right is the Loin where I procured the fat from.

 For this step I chose to grind both the Lean Meat and Fat Separately. I used my Lem Big Bite Grinder which is a phenomenal grinder. This baby will grind 17 lbs a minute. Anyhow to produce a clean grind I always grind meat first through the largest diameter plate I have (1/2 or 3/4 inch). Than I grind through a 1/4 diameter plate again keeping them separately. After these two grinds I combined the meat together and ground them again through a 1/4 inch plate. Doing it this way produces a homogenous grind for a Salume. There are many other techniques too. You could use different size plates for fat and meat. Note: During the grinding process I rotated the meat bins in and out of the freezer to keep meat temp very low.

Here is a list of the ingredients. For the first 7 ingredients.... hmmmm should I talk about them a bit? Salt....duh it's necessary. Cure # 1....Safety and color. Dextrose for flavor (type of sugar), I also used Sodium Phosphate to help with the yield and with its ability for allow proteins to hold on to more water. More water greater yield and moisture. Non-Fat Milk..... binder and to preserve moisture when cooking, Corn Syrup Solids....To enhance the binding, Sodium Erythorbate....Speed up the curing and to set color faster. Anyhow combine the first 7 ingredients in a large bowl and set aside.

For rest of the.....I used whole Calabrian Chilis and Grains of Paradise so I processed them in a spice mill. Now this part is important: I used fresh Garlic and I was slightly concerned about Cooking at Low Temp (Botulism) using Sous-Vide so I decided to poach the Garlic first. I poached the whole Garlic Cloves at 250 f in Olive Oil. I tossed in the Garlic and slowly raised temp of oil up-to 250 f which took a while. At that point I cooled the garlic in oil for about 10 minutes before I used them. Using a food processor I ground up the Garlic and Sun-dried Tomatoes together.
Just a few cool videos!!!!


Prep the cases. I used Higher Barrier 65 mm casing and a 100 mm Collagen Casing. The Collagen casings are great for smoking. I plan on smoking the 100 mm for a few hours.


Get the Sausage stuffer ready!!!! I've had this baby for at least 20 years.


65 mm stuffed!!!!
100 mm done too. I tied up the 100mm casing because because it will hung in my smoker.

Even though they are marked Water Proof & High Barrier casings I still didn't trust them. I'm going Vac seal them up to avoid any accidents. These babies will be cooked at 155 for 3 hours.
This huge Salume will Hot Smoke first for 3 hours at 200F.

All smoked and now vac sealed for the second phase of cooking. I'm going to Sous-Vide this baby at 155 f for 5 hours.
After all the Salume's were cooked they were Shocked in a huge Ice-bath and refrigerated for a day or two. The following pictures are gratuitous in nature. Review at the bottom of the pics...


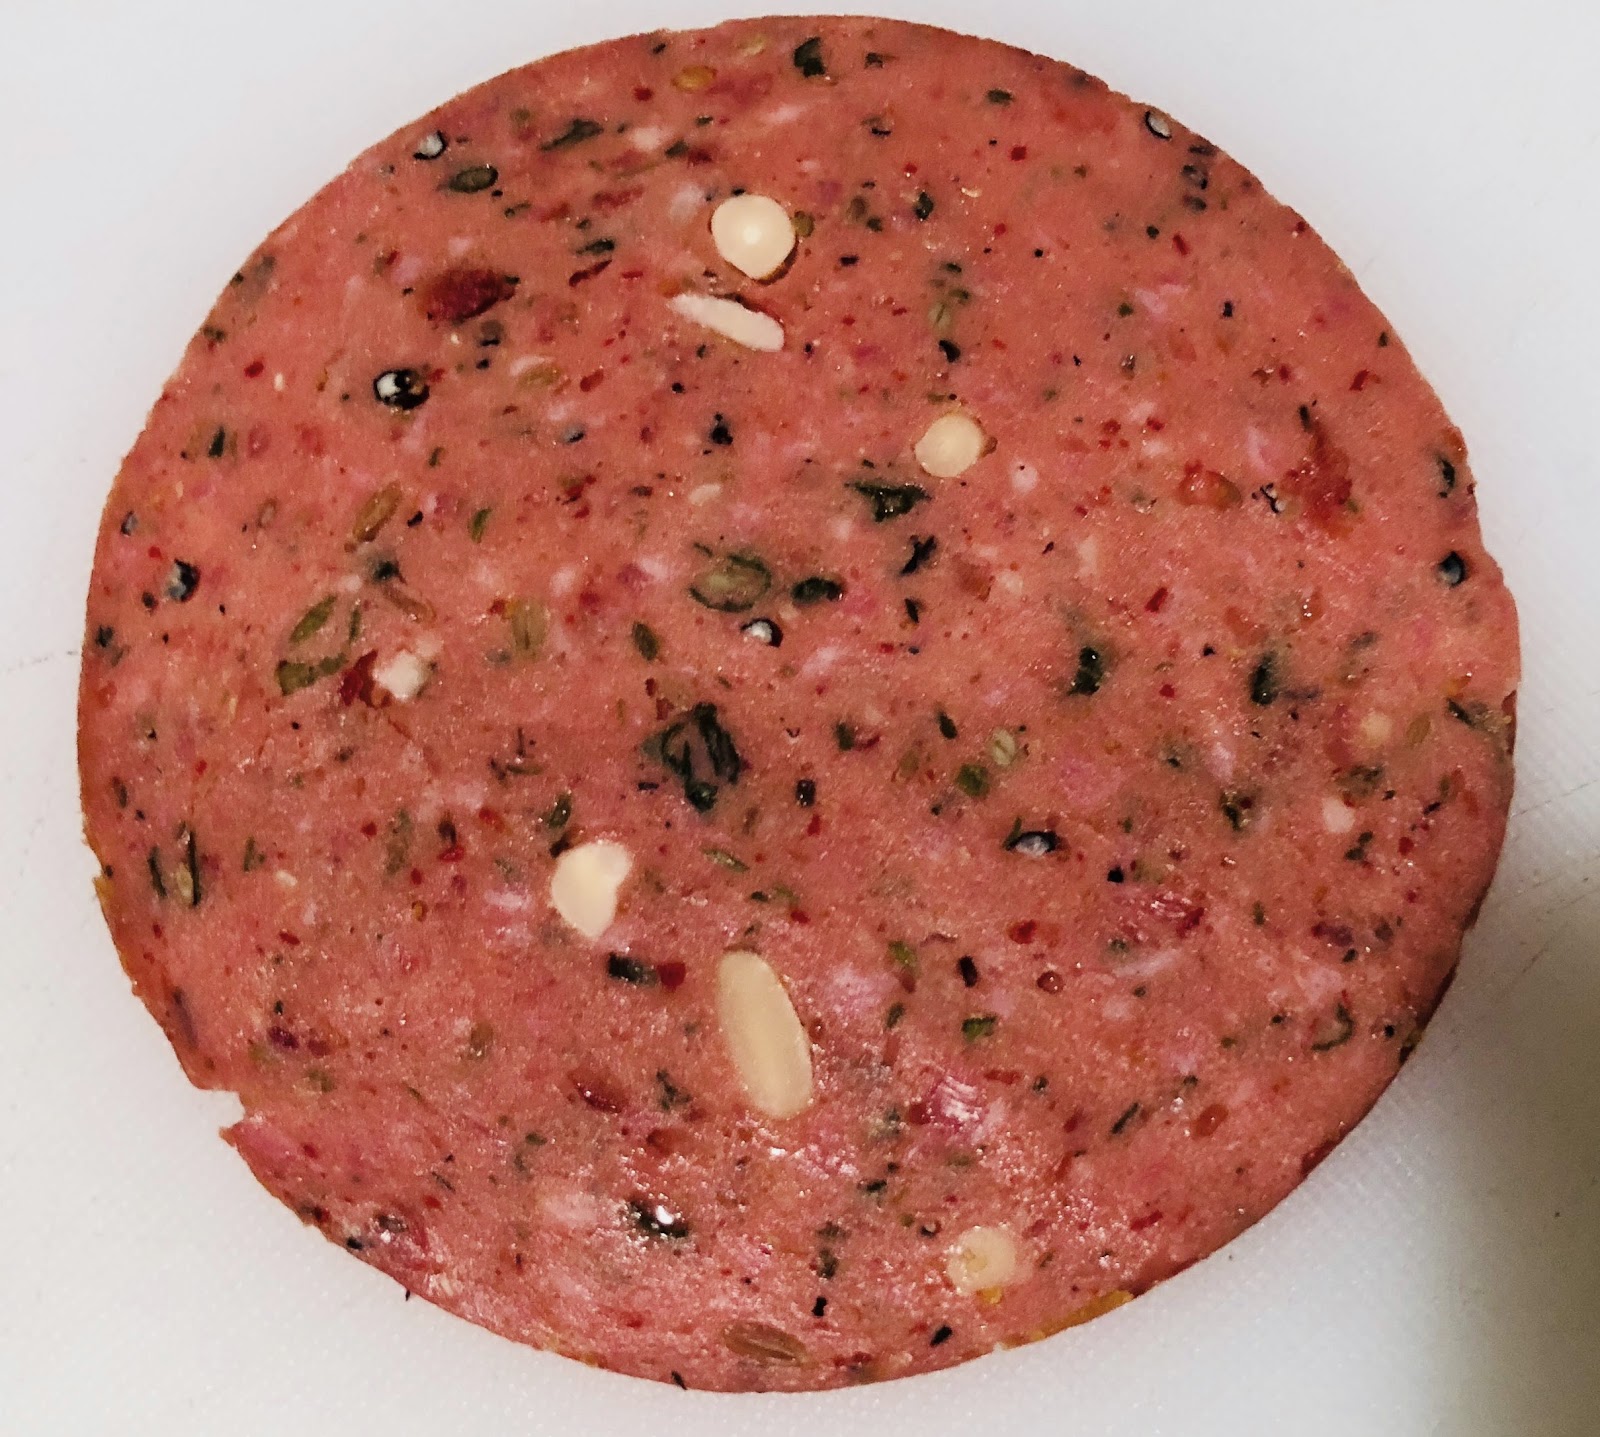


Review- Absolutely amazing. Everything about these Salume's were great. What changes would I make? Add 5% more fat. The larger size diameter Salume was easier to slice so that's what I will do in the future. I preferred the Smoked version over the non-smoked version. Those 3 hours of smoke did two things. It provided some mild awesome smoke flavor and it set the the meat. Much easier to slice than the non-smoked version.
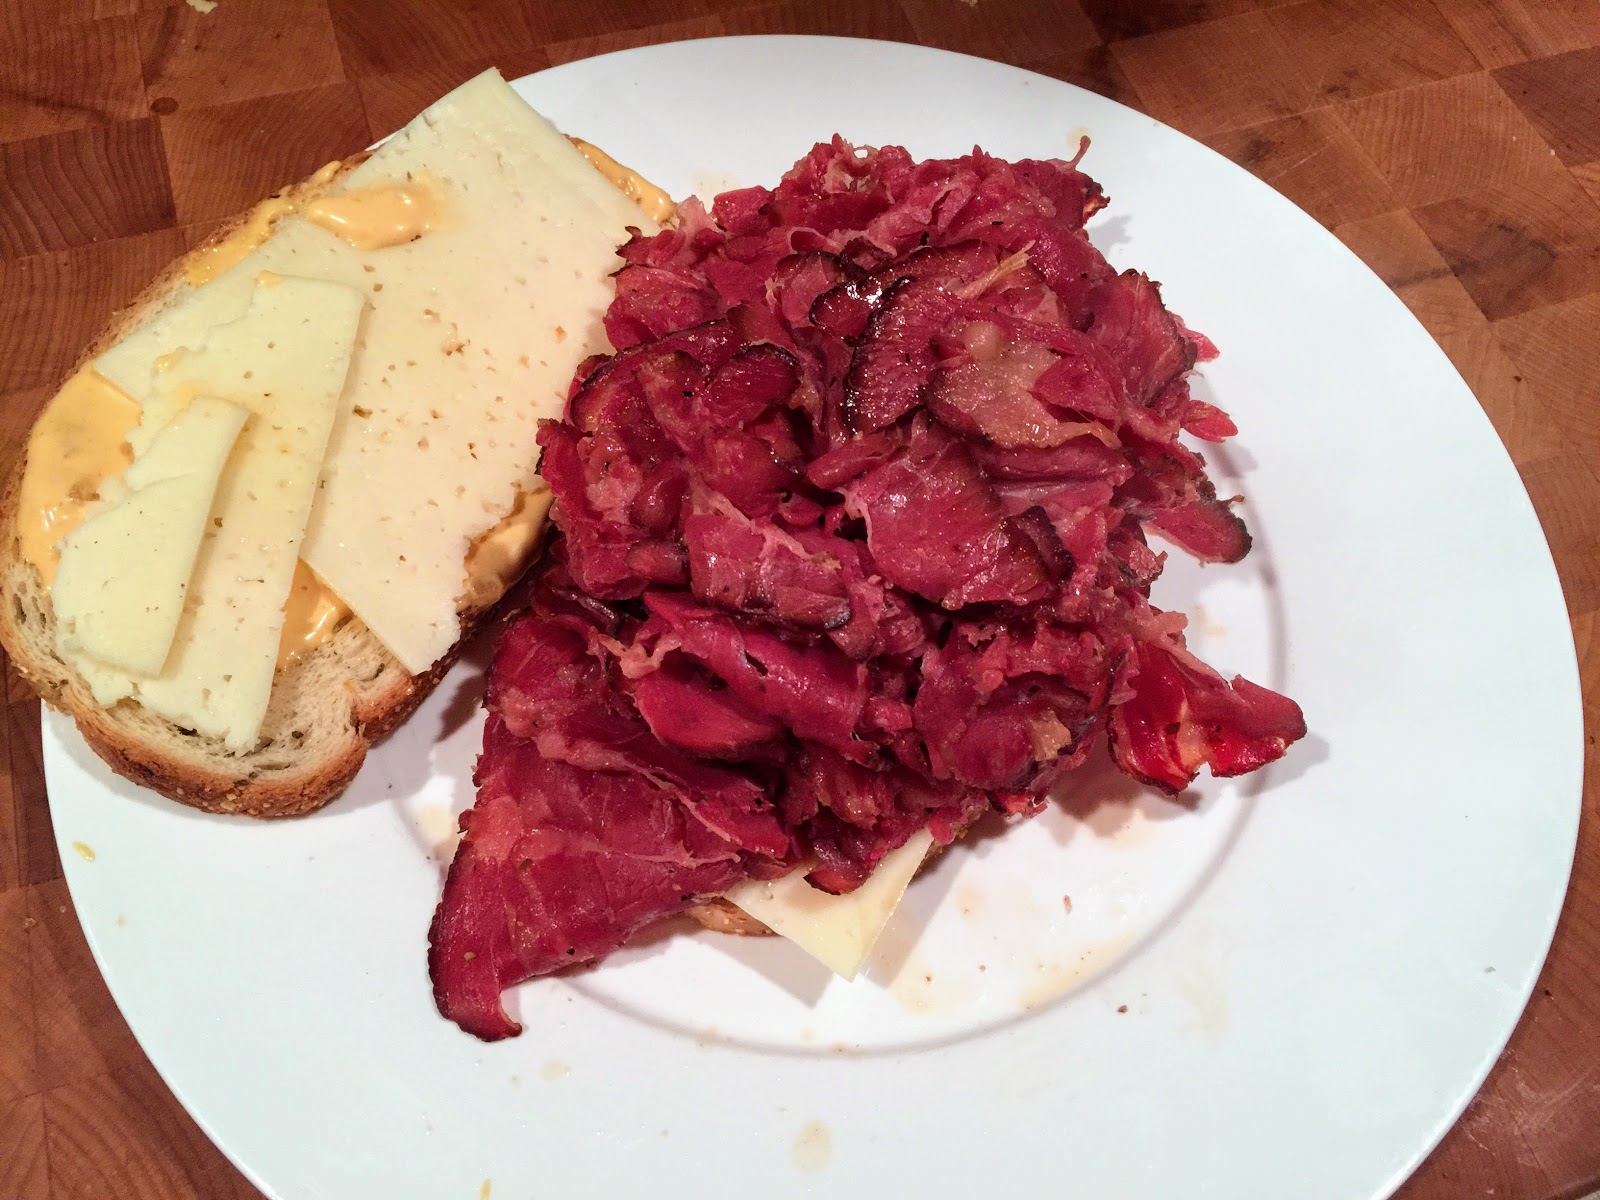
So what are the uses of this particular salume? Well if you look at the flavor profile it has many uses. Sandwiches obviously and if you fry them just a little it enhances the overall taste.
Sandwiches
Stuff Shell stuffings
Lasagna
Braciola
Pizza Topping
Calzone
etc etc


