

Here we go again.......another fabulous bacon but this time made from Lamb. Yea.. Lamb-Baconesque meaning Esque- in the manner of style. I was making some Beef and Lamb Sausage and I had left over Belly. Hmmm...as always I was thinking outside of the box and came up with the idea of Lamb Bacon. The belly is extremely thin and would ordinarily be poor choice for bacon but I had an idea. How about rolling two of them together with TG? Transglutaminase RM to the rescue aka Meat Glue. If you haven't played around with TG you must take the culinary plunge and glue something together. Here is a list of my Experiments.

Just the other side of the picture. Heres the other side of the Lamb.


Using a very sharp boning knife remove the meat from the bones. Work slowly keep knife very close to the bones that way you can remove the majority of the meat.

Place meat in container and prep the Cure.

In a separate bowl combine the salt with the Cure # 1 and the optional Bacon-Booster (this is an Eq cure). Mix the rest of the dry ingredients and set aside. The Orange Peel (from Penzeys) and the Mustard Powder act as an Antioxidant which will reduce the gaminess that is always associated with Lamb. Lamb contains a lot of unsaturated fat and when cooks will oxidize and give a pronounced flavor. Using Antioxidants such as Orange Peel and Mustard will give a subtle lamb flavor instead of a punch in the gut.


First coat Lamb with Salt and Cure Mixture. Than add other dry ingredients. Make sure it gets into every nook and cranny. Add the syrup and massage into the Lamb.

After seven days this is what it looks like. Make sure to rinse very well and dry off.
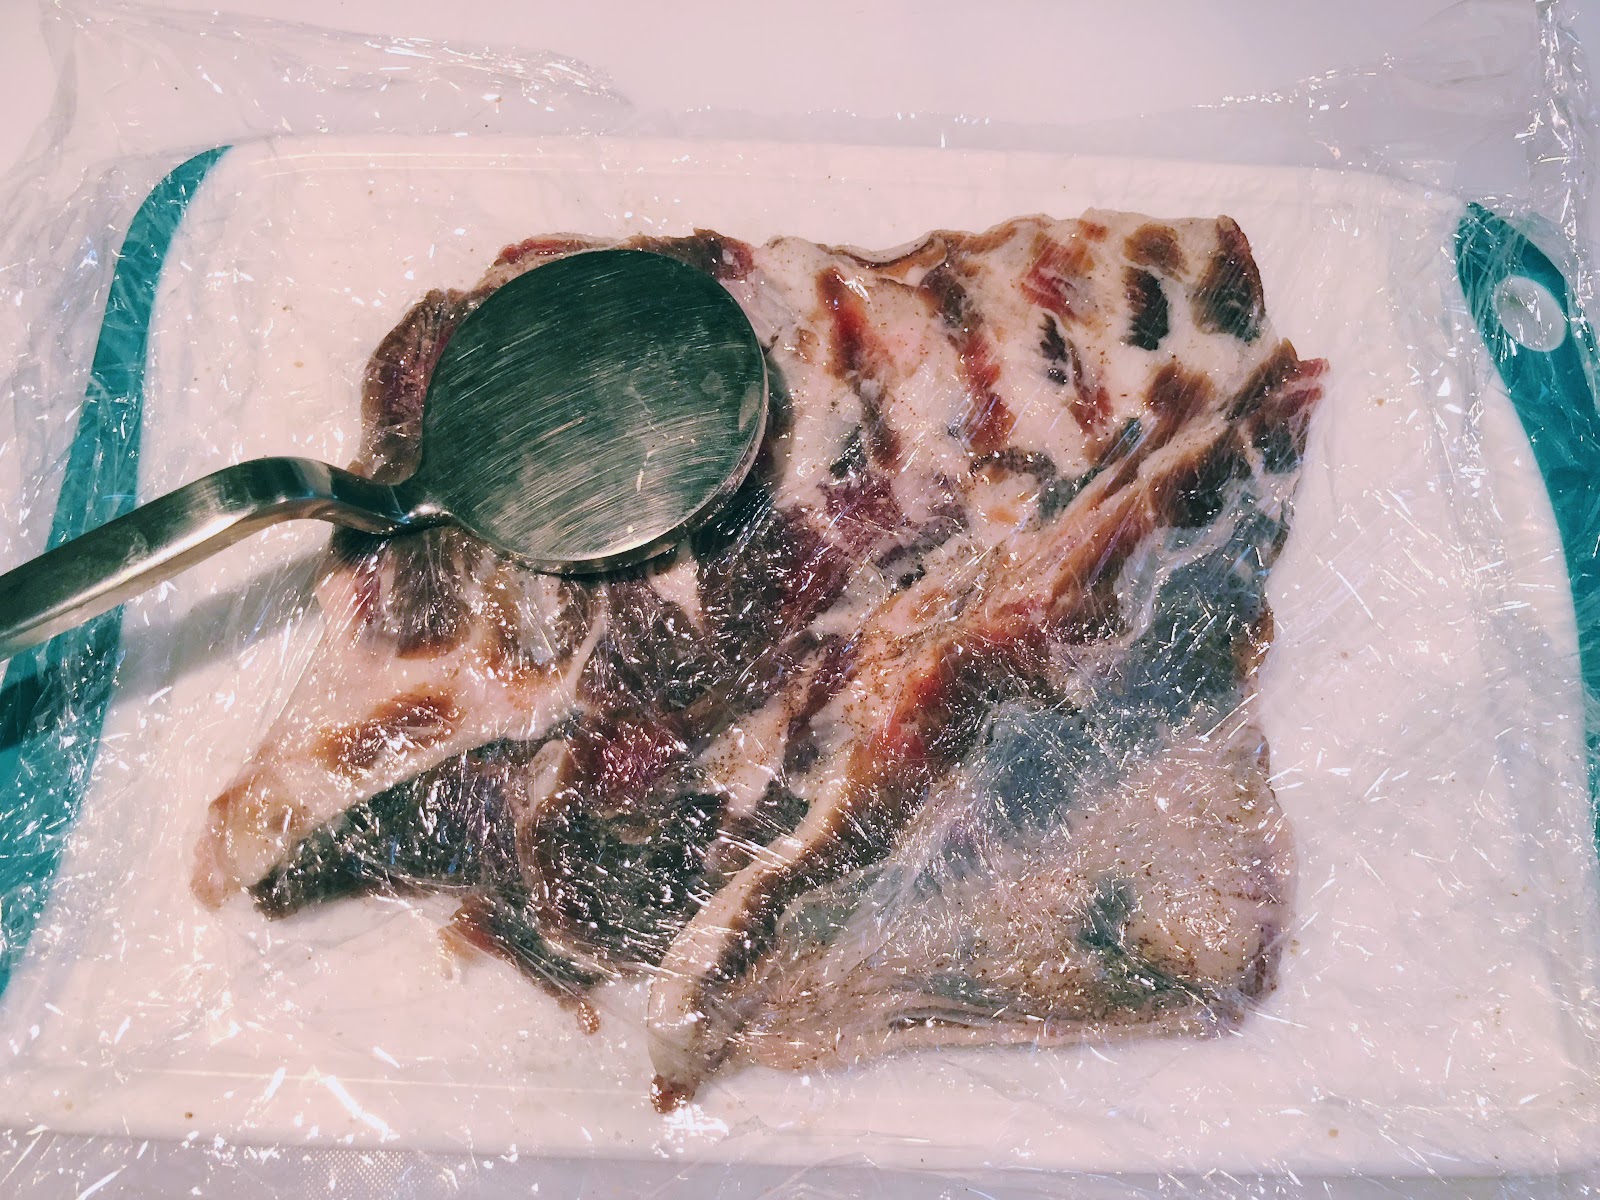
Place Belly between plastic wrap and pound until all even in thickness.

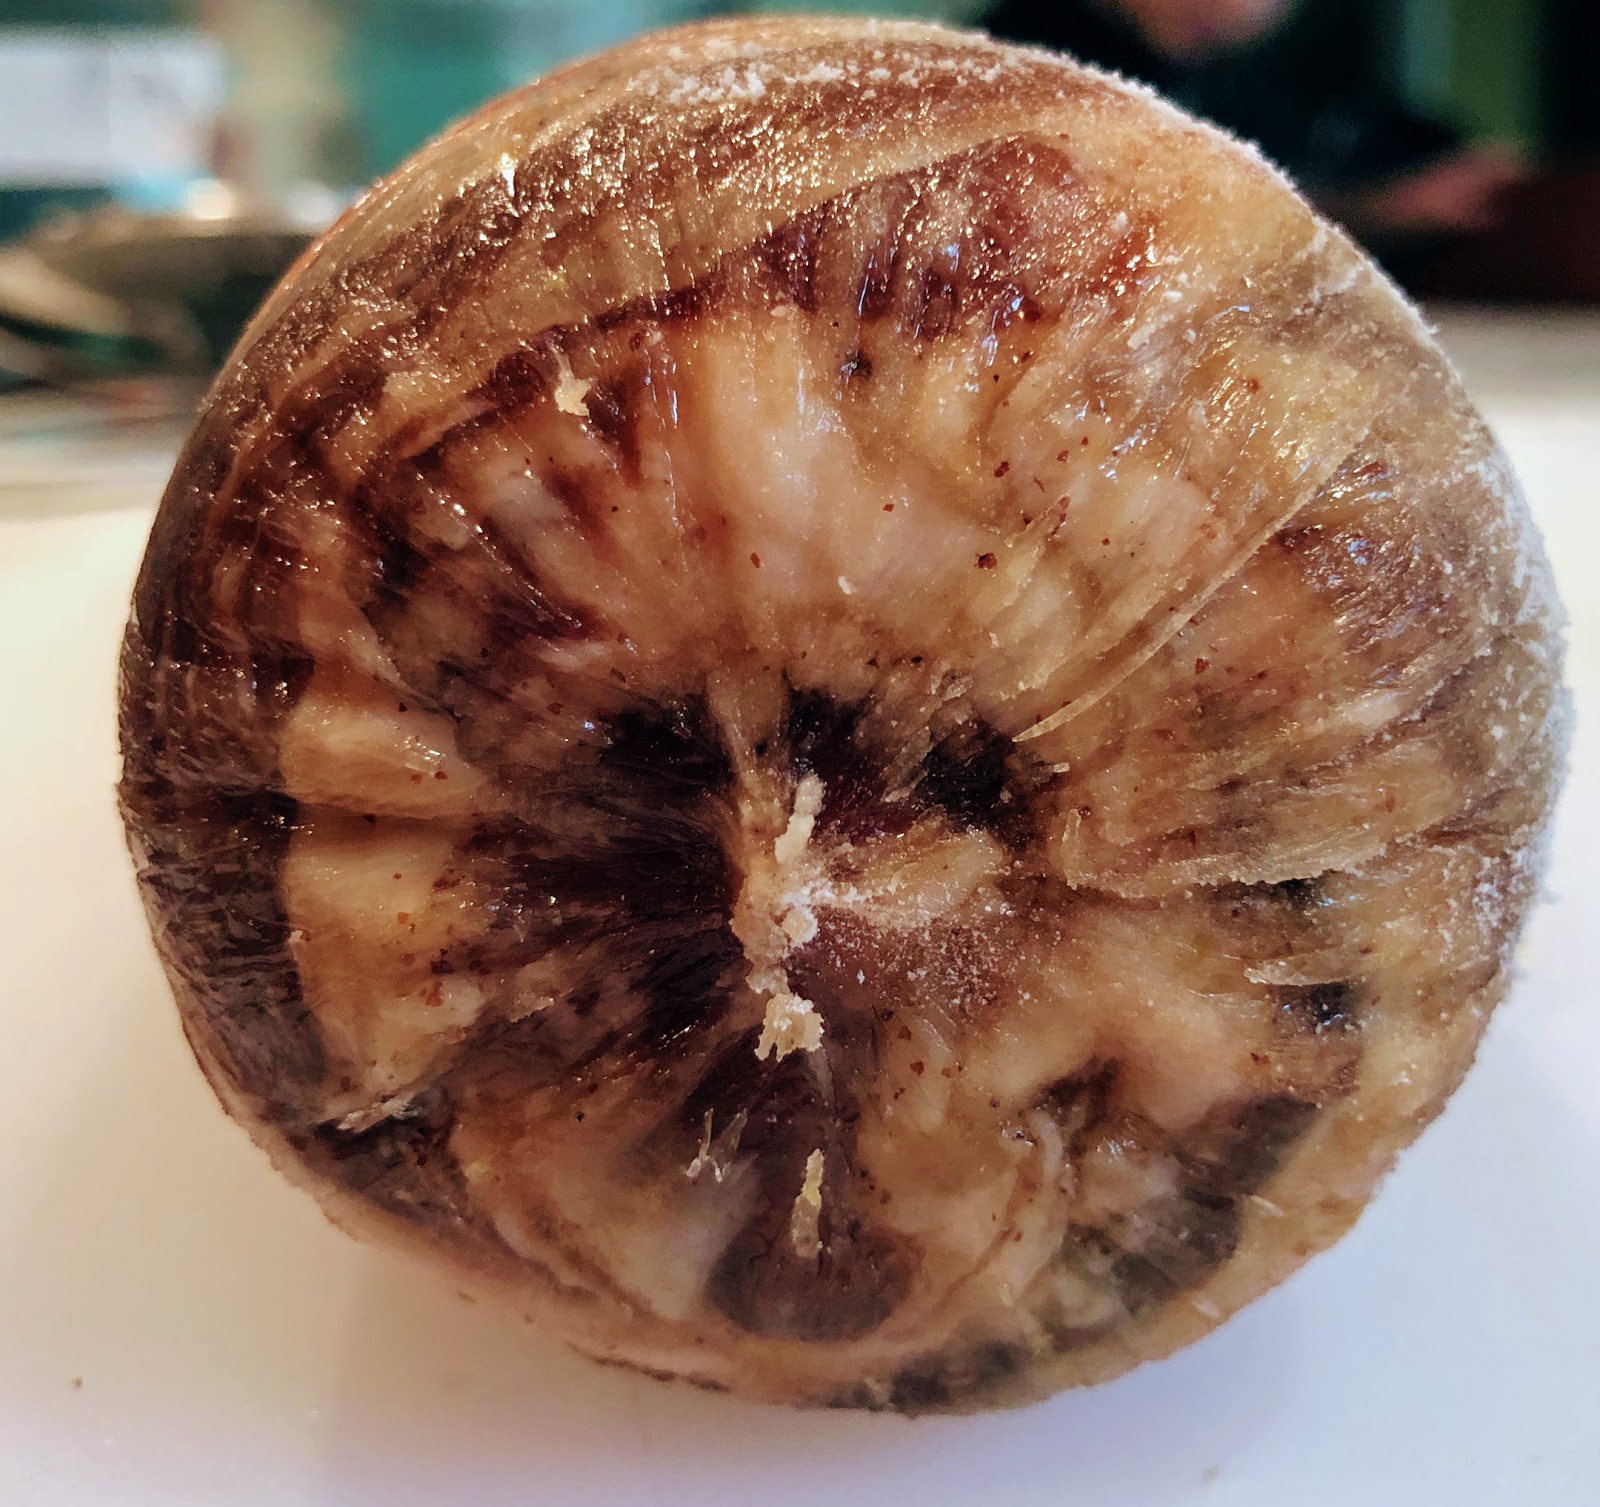
I forgot to take a picture of the next step but this link HERE will help you understand what I did. Place Lamb on plastic wrap (24 inches) overlapping the lamb slightly by a few inches. Sprinkle on Transglutaminase aka Meat Glue getting it into every nook and cranny. I mean cover every square inch of that Lamb and roll very tight creating a cylinder. You will need to tie the ends with string but only after pinching and ensuring the ends are extremely tight. It will sit in the refrigerator for a minimum of 24 hours for the proteins to bond. After the proteins bond I will cold smoke for 6-10 hours.
All bonded and ready for the next step.
All bonded and ready for the next step.


Paint on just a little pure maple syrup which will be the glue for the pepper and maple sugar coating.


Coat with Black Pepper and Maple Sugar. Cold smoked... 8 hours only.

This is what it looks like after a long cold smoke. Don't forget it's still raw!!!! Anyone that tells you that you need to cook it or hot smoke until 150 f is full of...S*** . If you were to cook this at a higher temp all that beautiful fat would render away.
Review will be at the bottom of the pictures.


Review- Absolutely amazing!!!!! I hit a double Grand-Slam!!! If it's at all possible this is better than my beef bacon. Although you cannot taste it the addition of the mustard and the Orange peel mellowed out the lamb that put it way over the top. I may in the future glue 3 bellies together.


